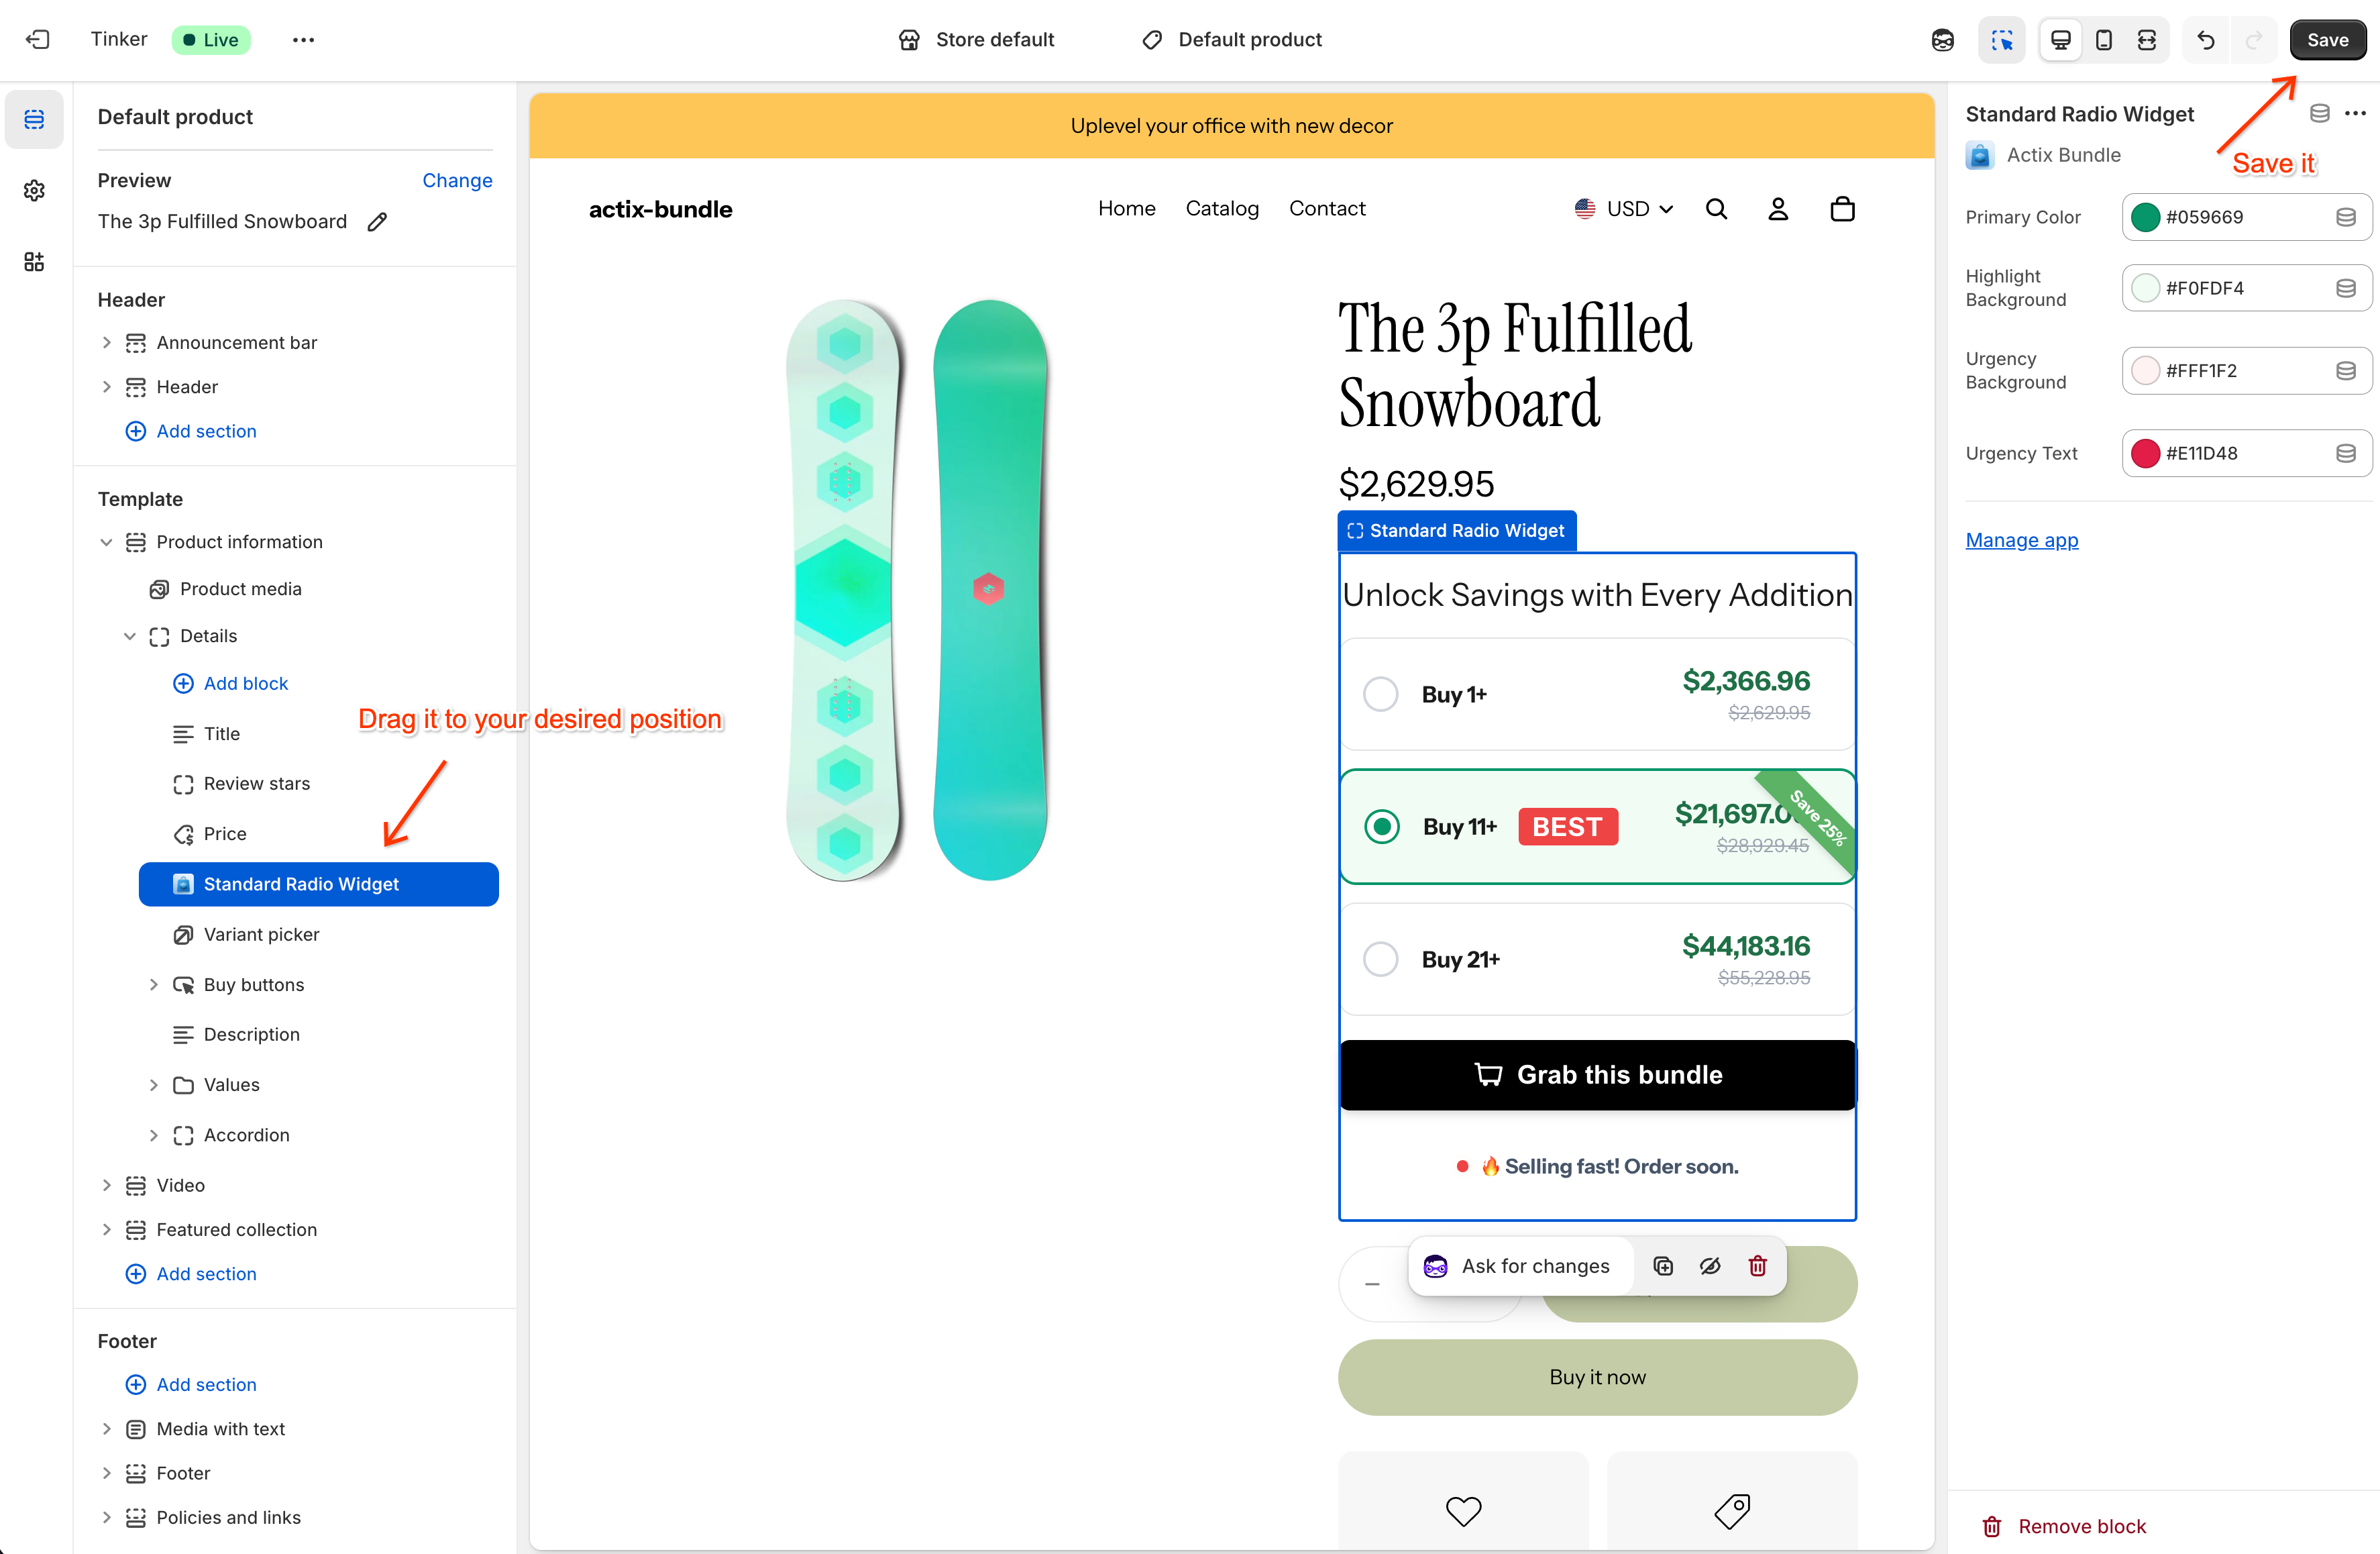
Volume Radio
The Volume Radio widget displays quantity breaks as a list of selectable radio buttons. This layout is ideal for offering a clear, linear selection where customers can easily compare discount tiers and choose their preferred quantity with a single click.
Step 1: Prerequisites
Before proceeding, please ensure you have installed the app and enabled the App Embed. For detailed instructions, refer to the Getting Started guide.
Note: The App Embed must be enabled for the bundles to appear on your storefront.
Step 2: Select Volume Radio
Go to the Actix Bundle dashboard, click on the Bundles tab, and select the Volume Radio option.
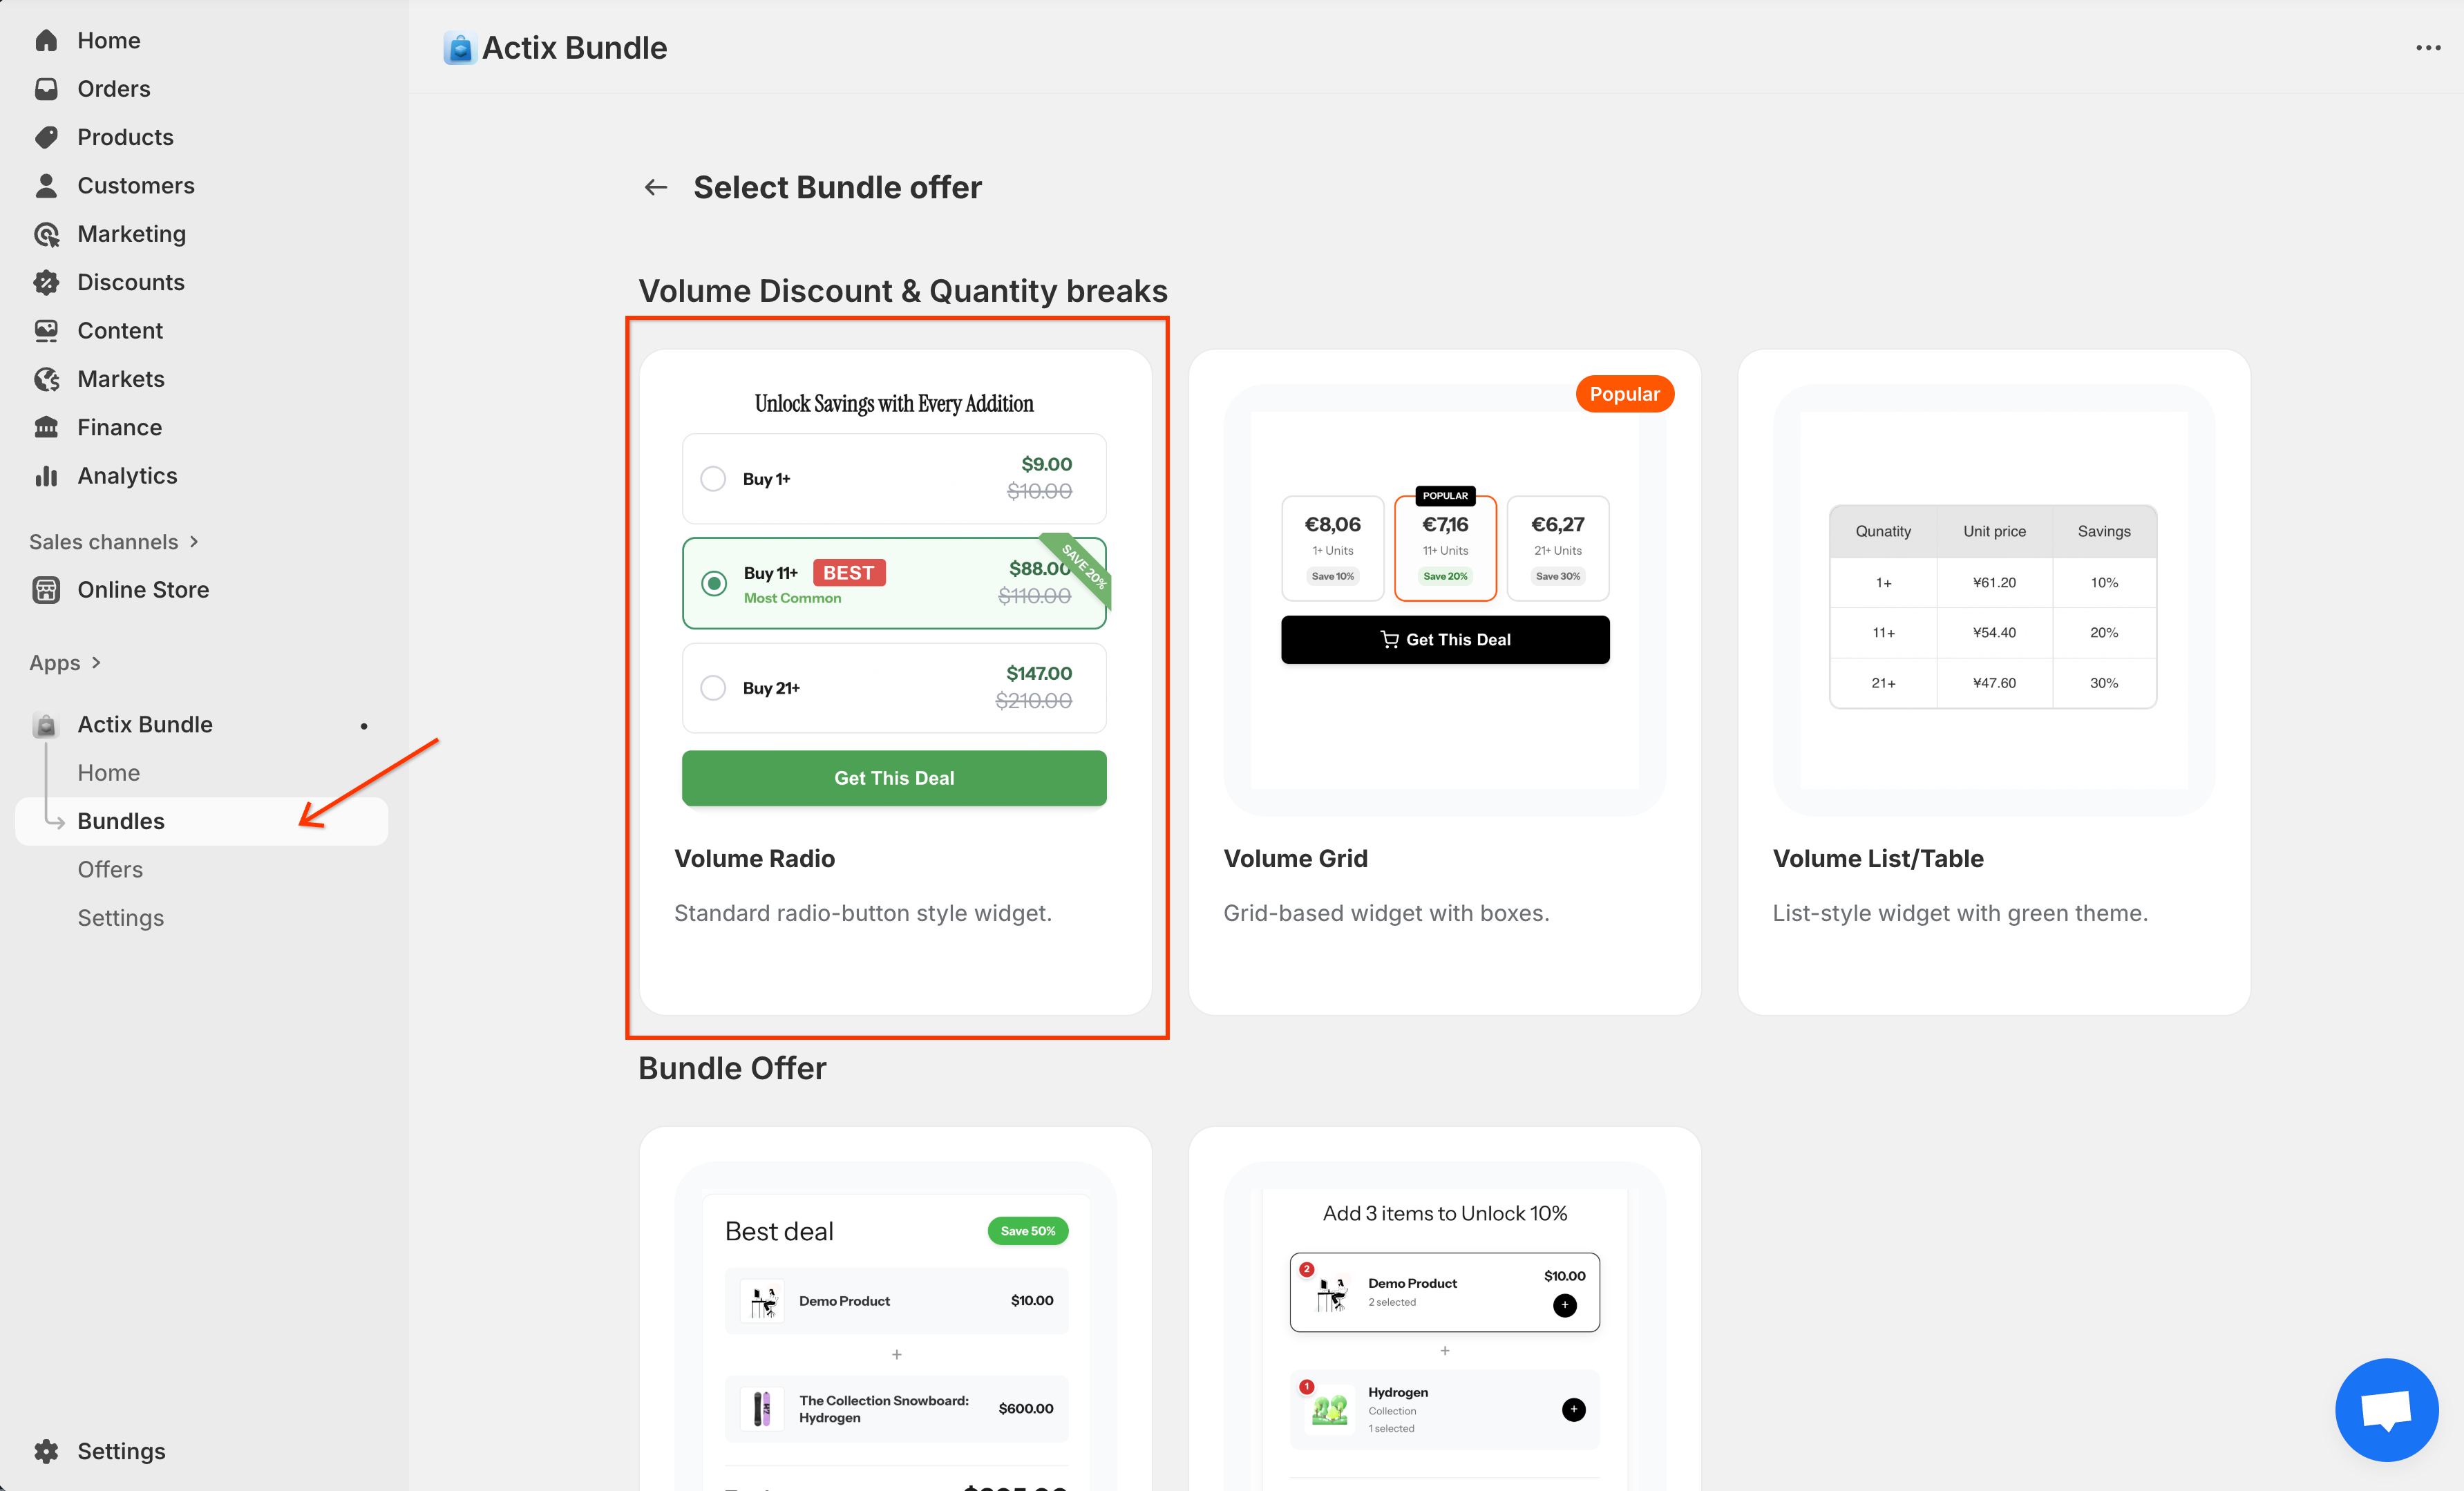
This will open the Volume Radio configuration page.
Step 3: Configure General Settings
General Settings allow you to define the basic details of your volume discount.
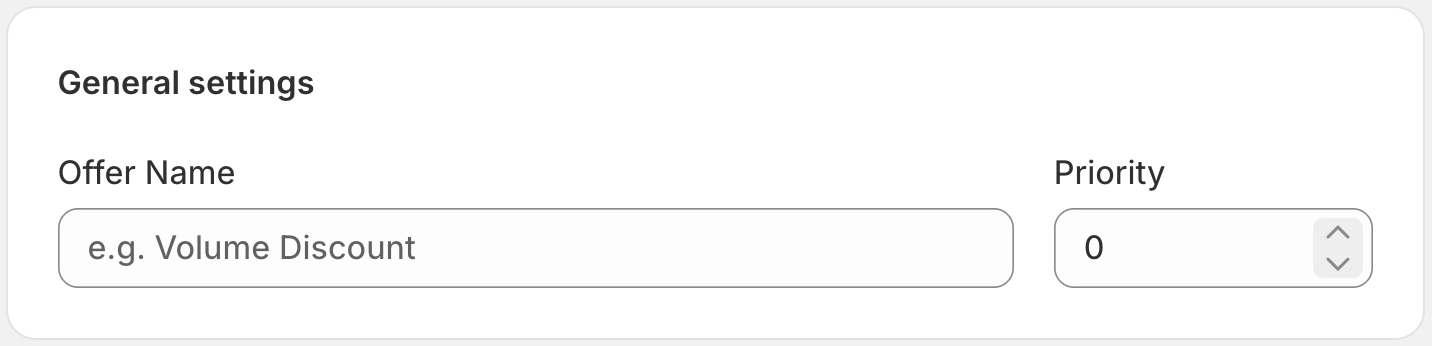
- Offer Name: Internal name for identifying this rule.
- Priority: Determines application order if multiple rules apply (higher numbers take precedence).
Step 4: Define Applied Customers
Control which customers are eligible for this discount.
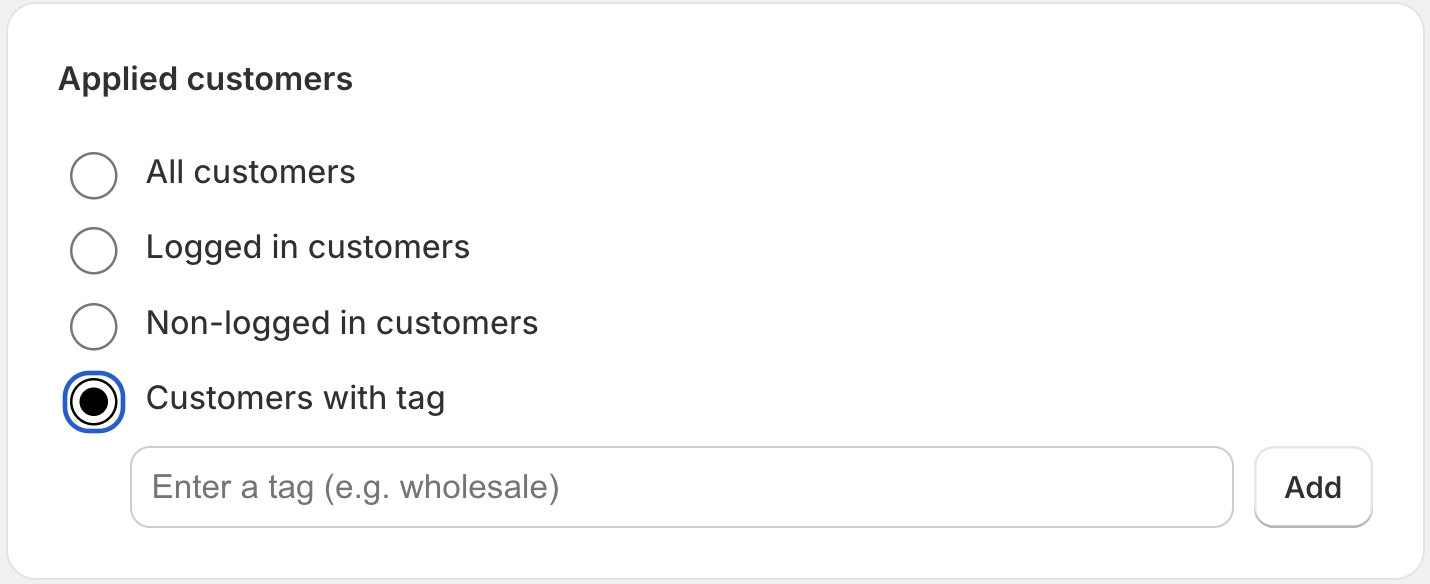
- All customers: Available to everyone.
- Logged in customers: Only for signed-in accounts.
- Non-logged in customers: Only for guest visitors.
- Customers with tag: Restricted to customers with specific profile tags.
Step 5: Set Product Conditions
Determine which products this discount rule applies to.
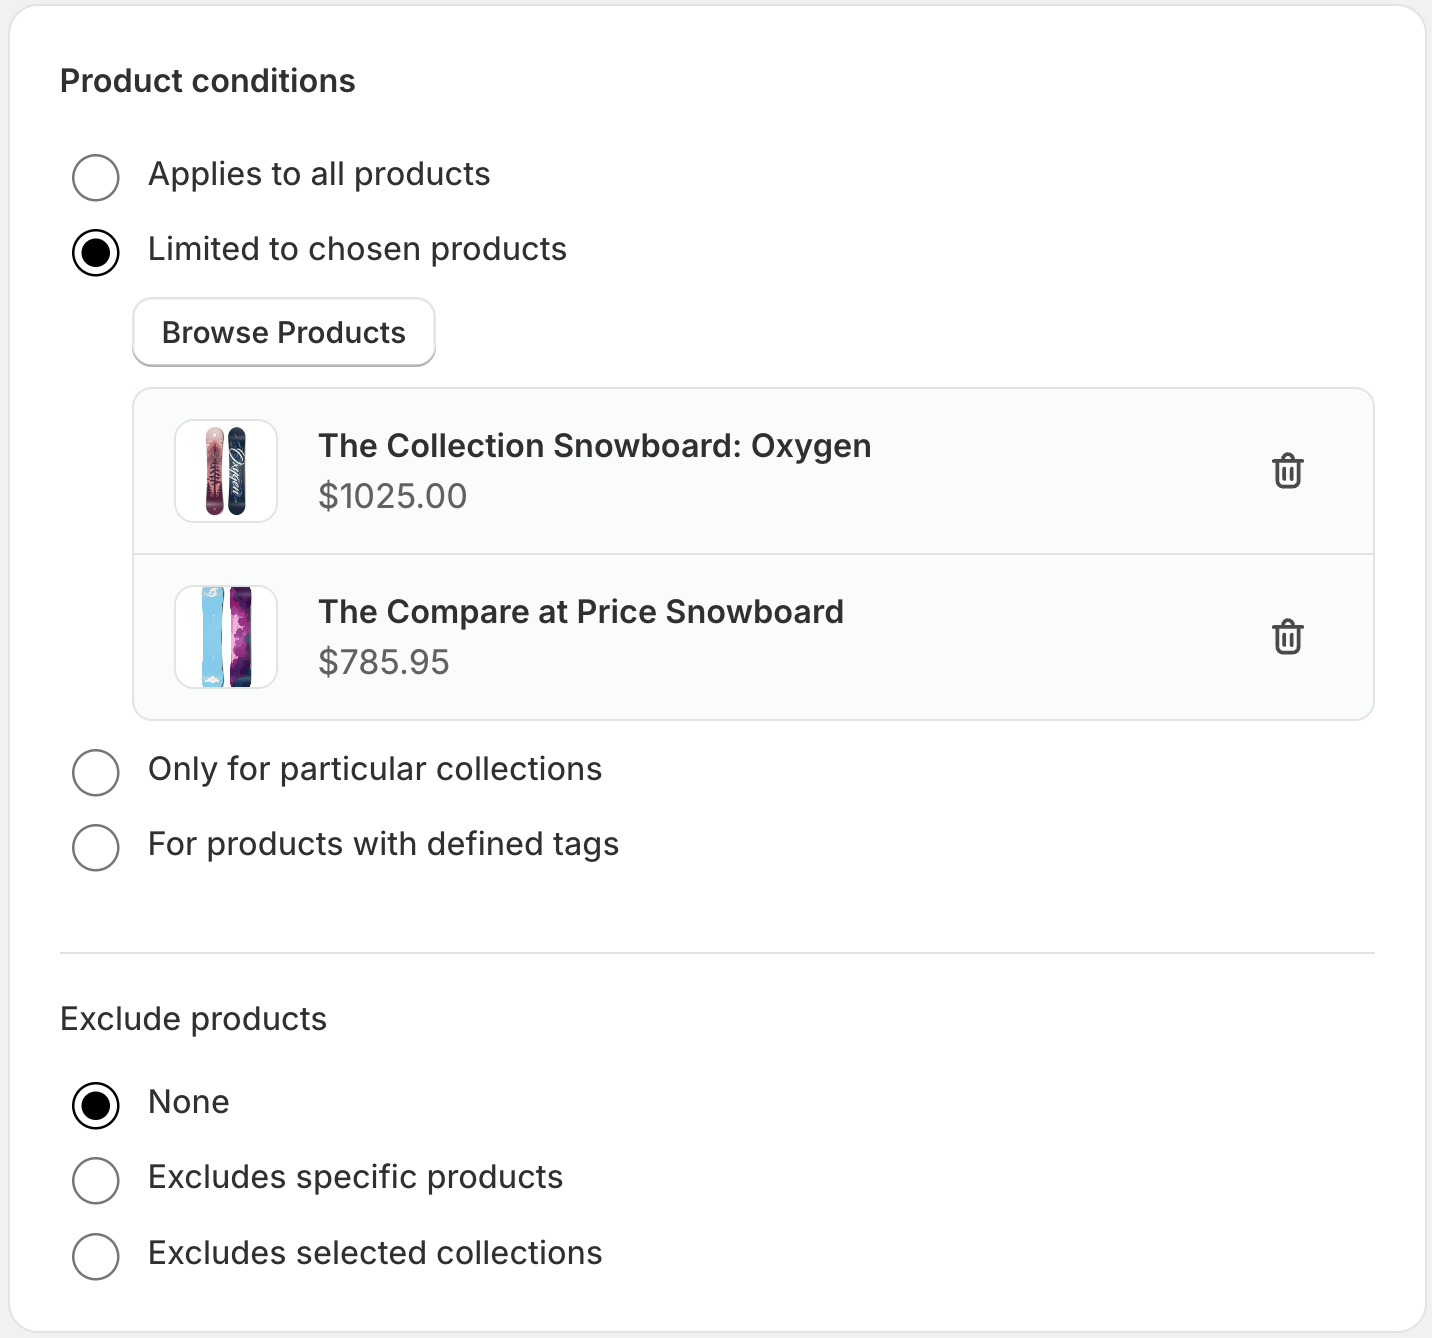
- All products: Applies to every product.
- Specific products: Select specific products only.
- Specific collections: Apply to entire collections.
- Products with tag: Dynamic selection based on product tags.
- Exclude products: Explicitly exclude items even if they match other criteria.
Step 6: Configure Volume Tiers
This is the core configuration for the Volume Radio widget.
- Enable Toggle: Switch to On to activate the discount.
- Add Range: Create new quantity tiers.
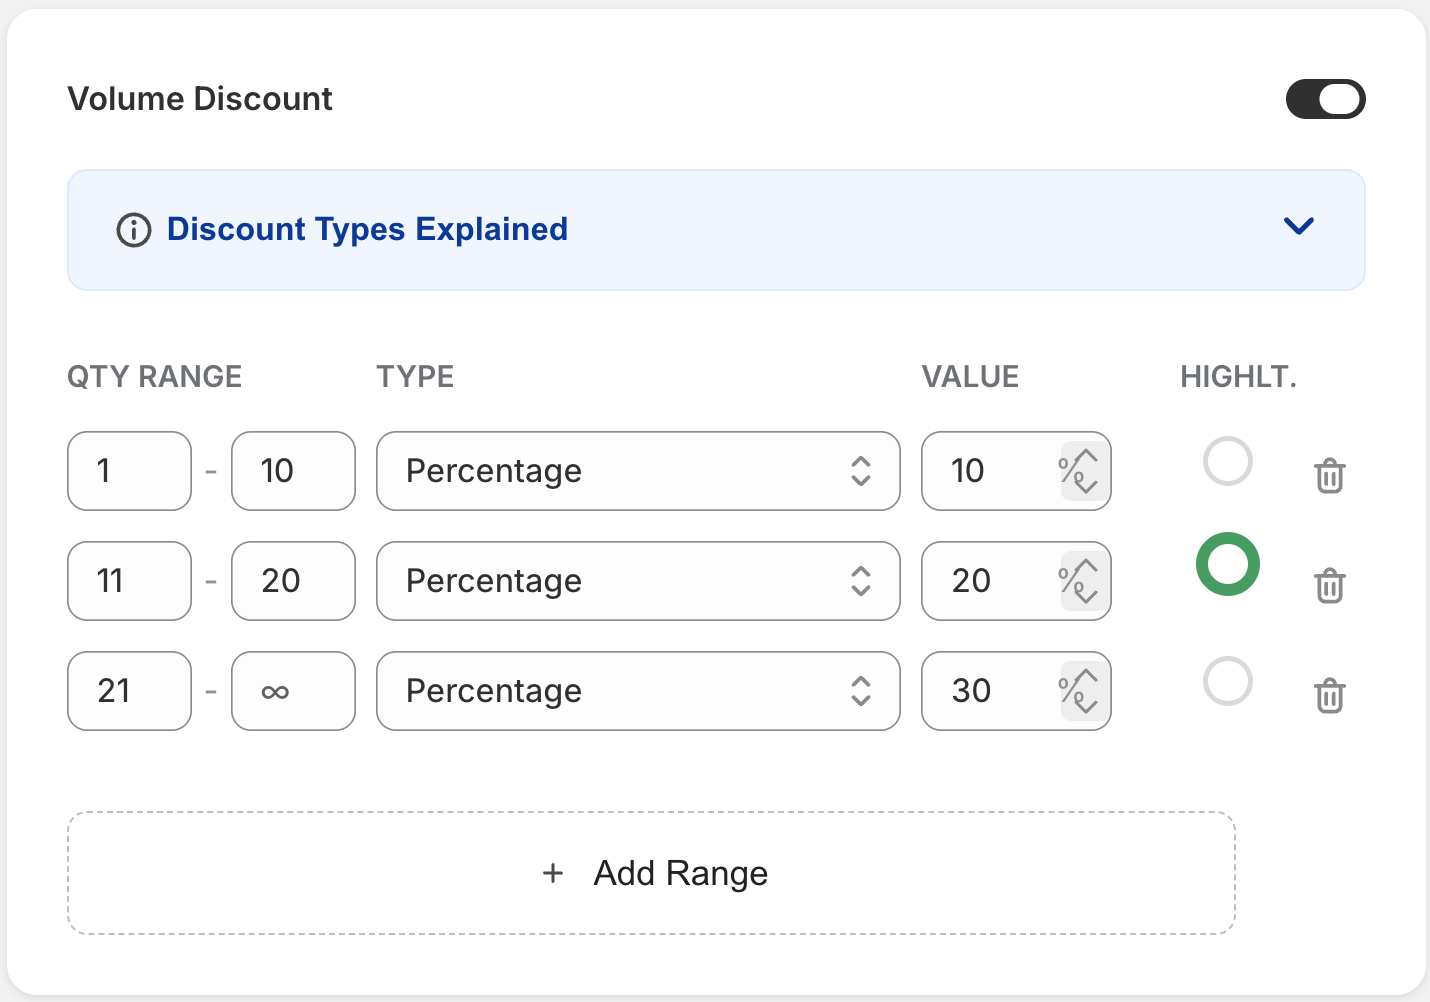
Quantity Range Options
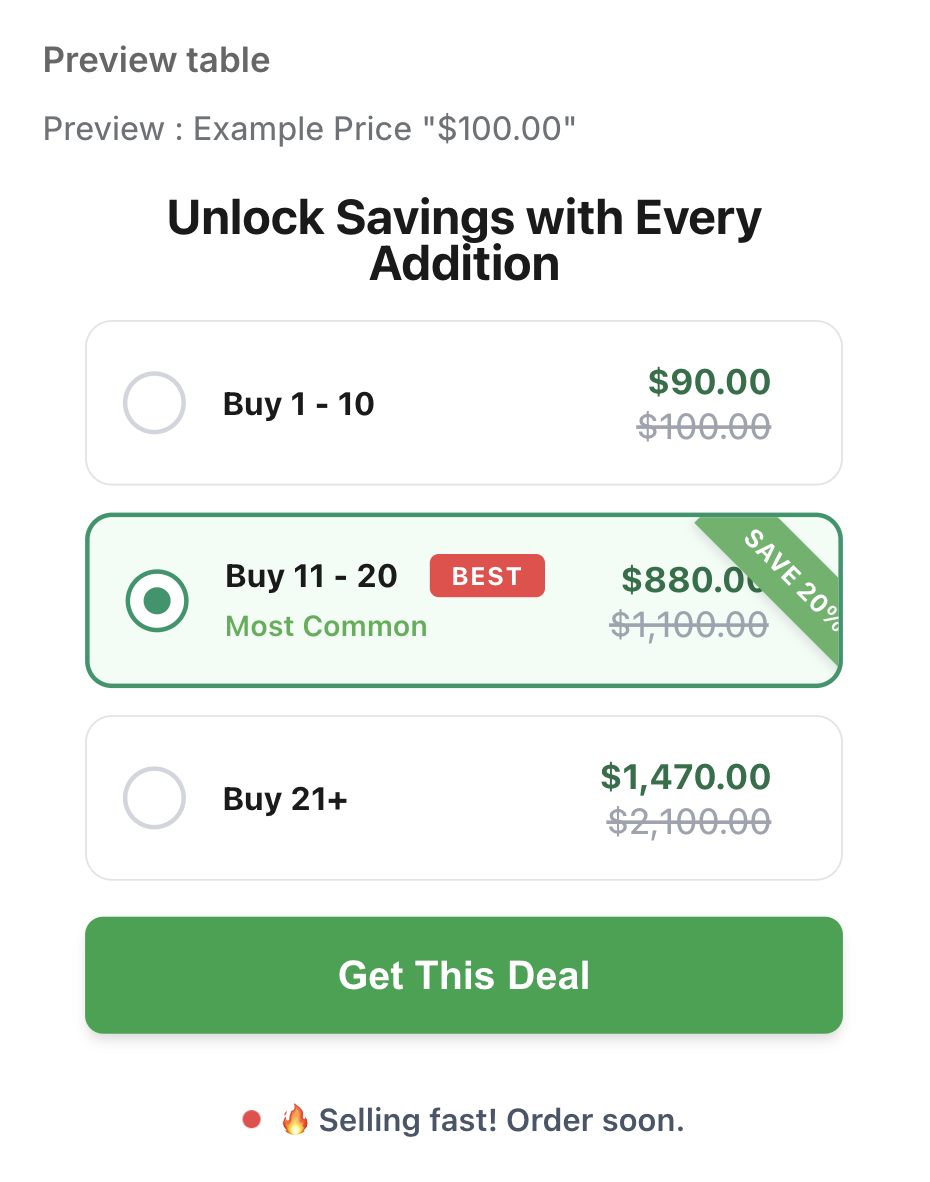
Closed Range (e.g., Buy 1 - 10) Enter a start and end quantity.
Open-Ended Range (e.g., Buy 1+) Enter a start quantity and leave the end quantity blank.
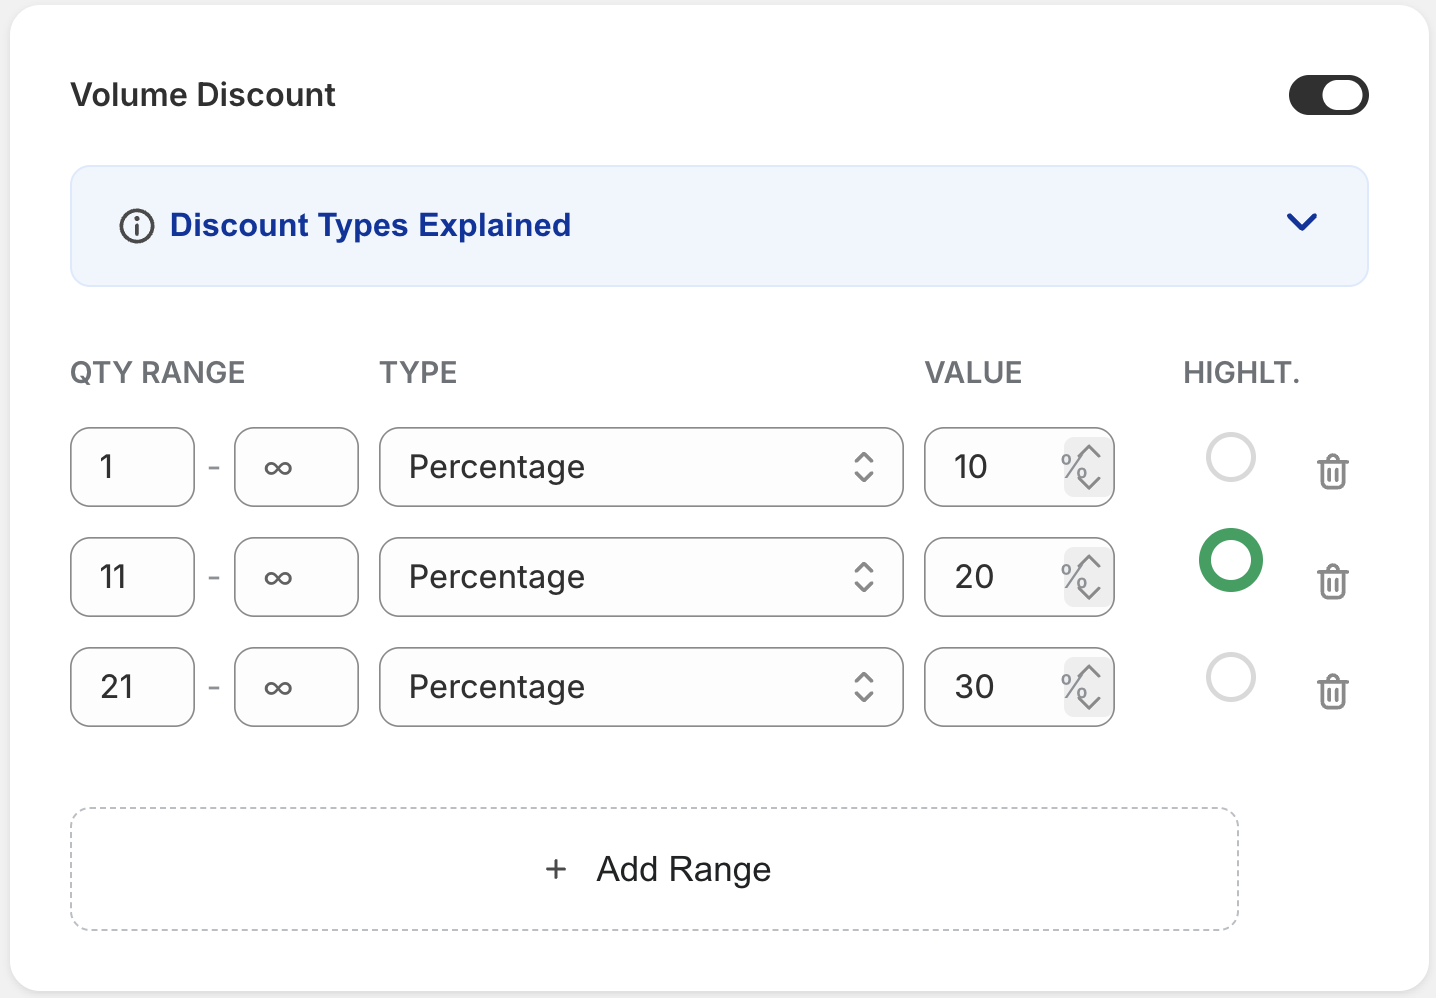
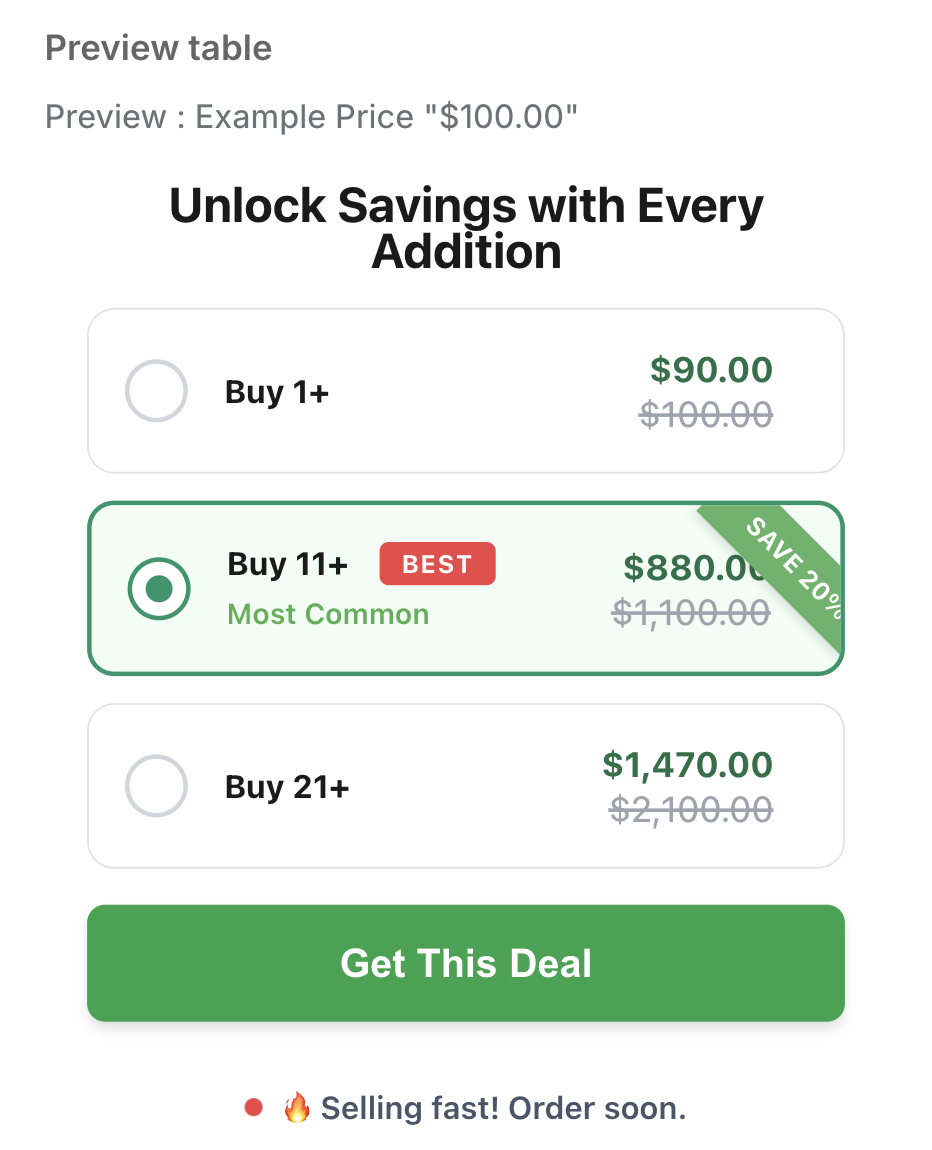
Discount Settings
- Discount Type: Percentage (%) or Fixed Amount ($).
- Discount Value: Numerical value of the discount.
- Highlight: Mark a range as "Best Value" to highlight it on the storefront.
Step 7: Manage Combinations
Control how this discount interacts with other discounts.
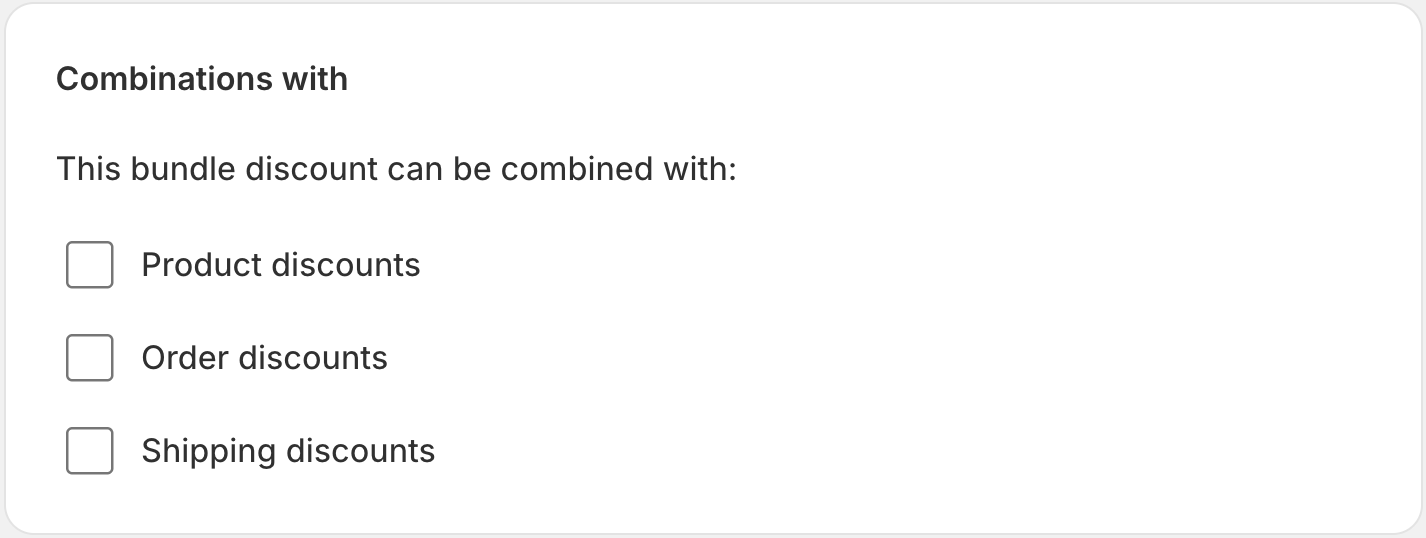
- Order Discounts: Allow combination with order-level coupons.
- Product Discounts: Stack with other product-level discounts.
- Shipping Discounts: Apply even if shipping discounts are present.
Step 8: Schedule Active Dates
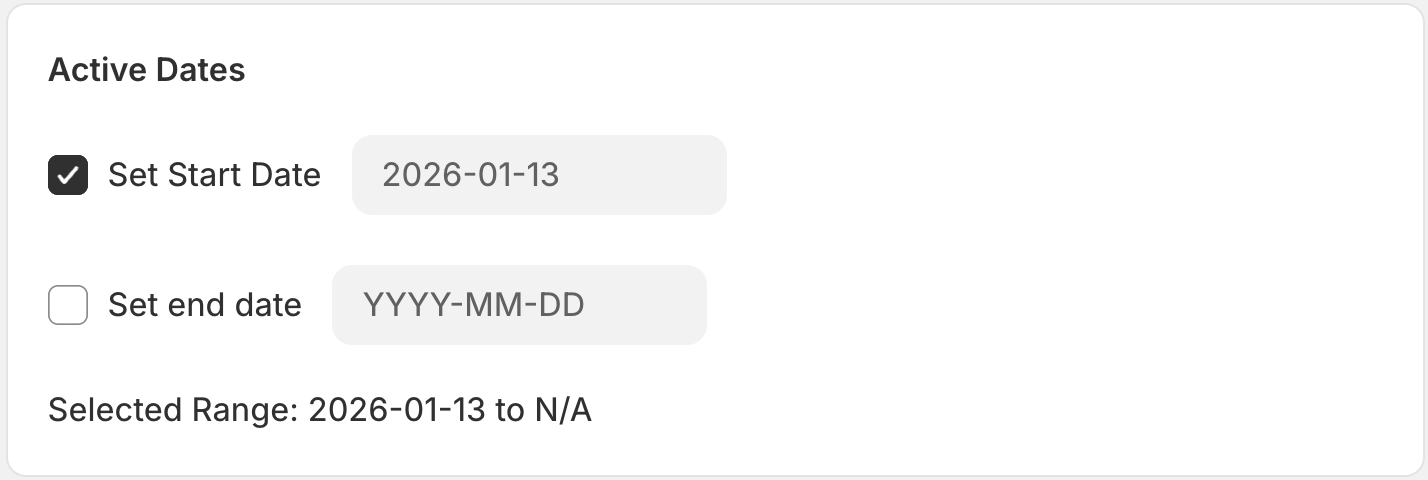
- Start Date: When the discount begins.
- End Date: (Optional) When the discount automatically expires.
Step 9: Review Summary
Manage the status and language settings.
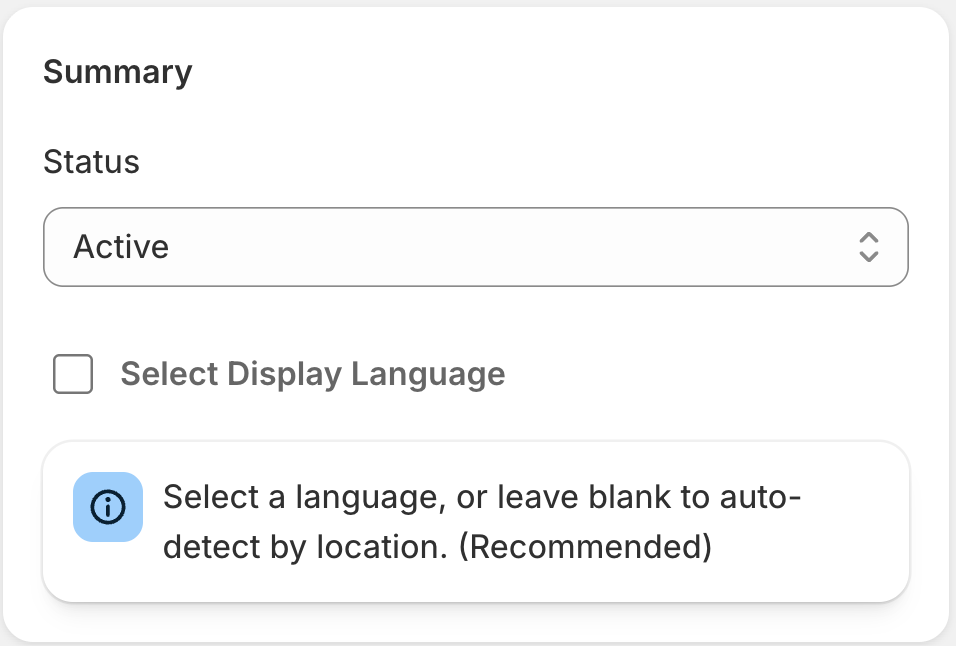
- Status: Draft (inactive) or Active (live).
- Select Display Language: Widget language (leave blank for auto-detection).
Step 10: Save and Publish
Click the Save button to publish your discount.
Step 11: Add Widget to Storefront
To display the Volume Radio widget on your product pages, you need to add it via the Shopify Theme Editor.
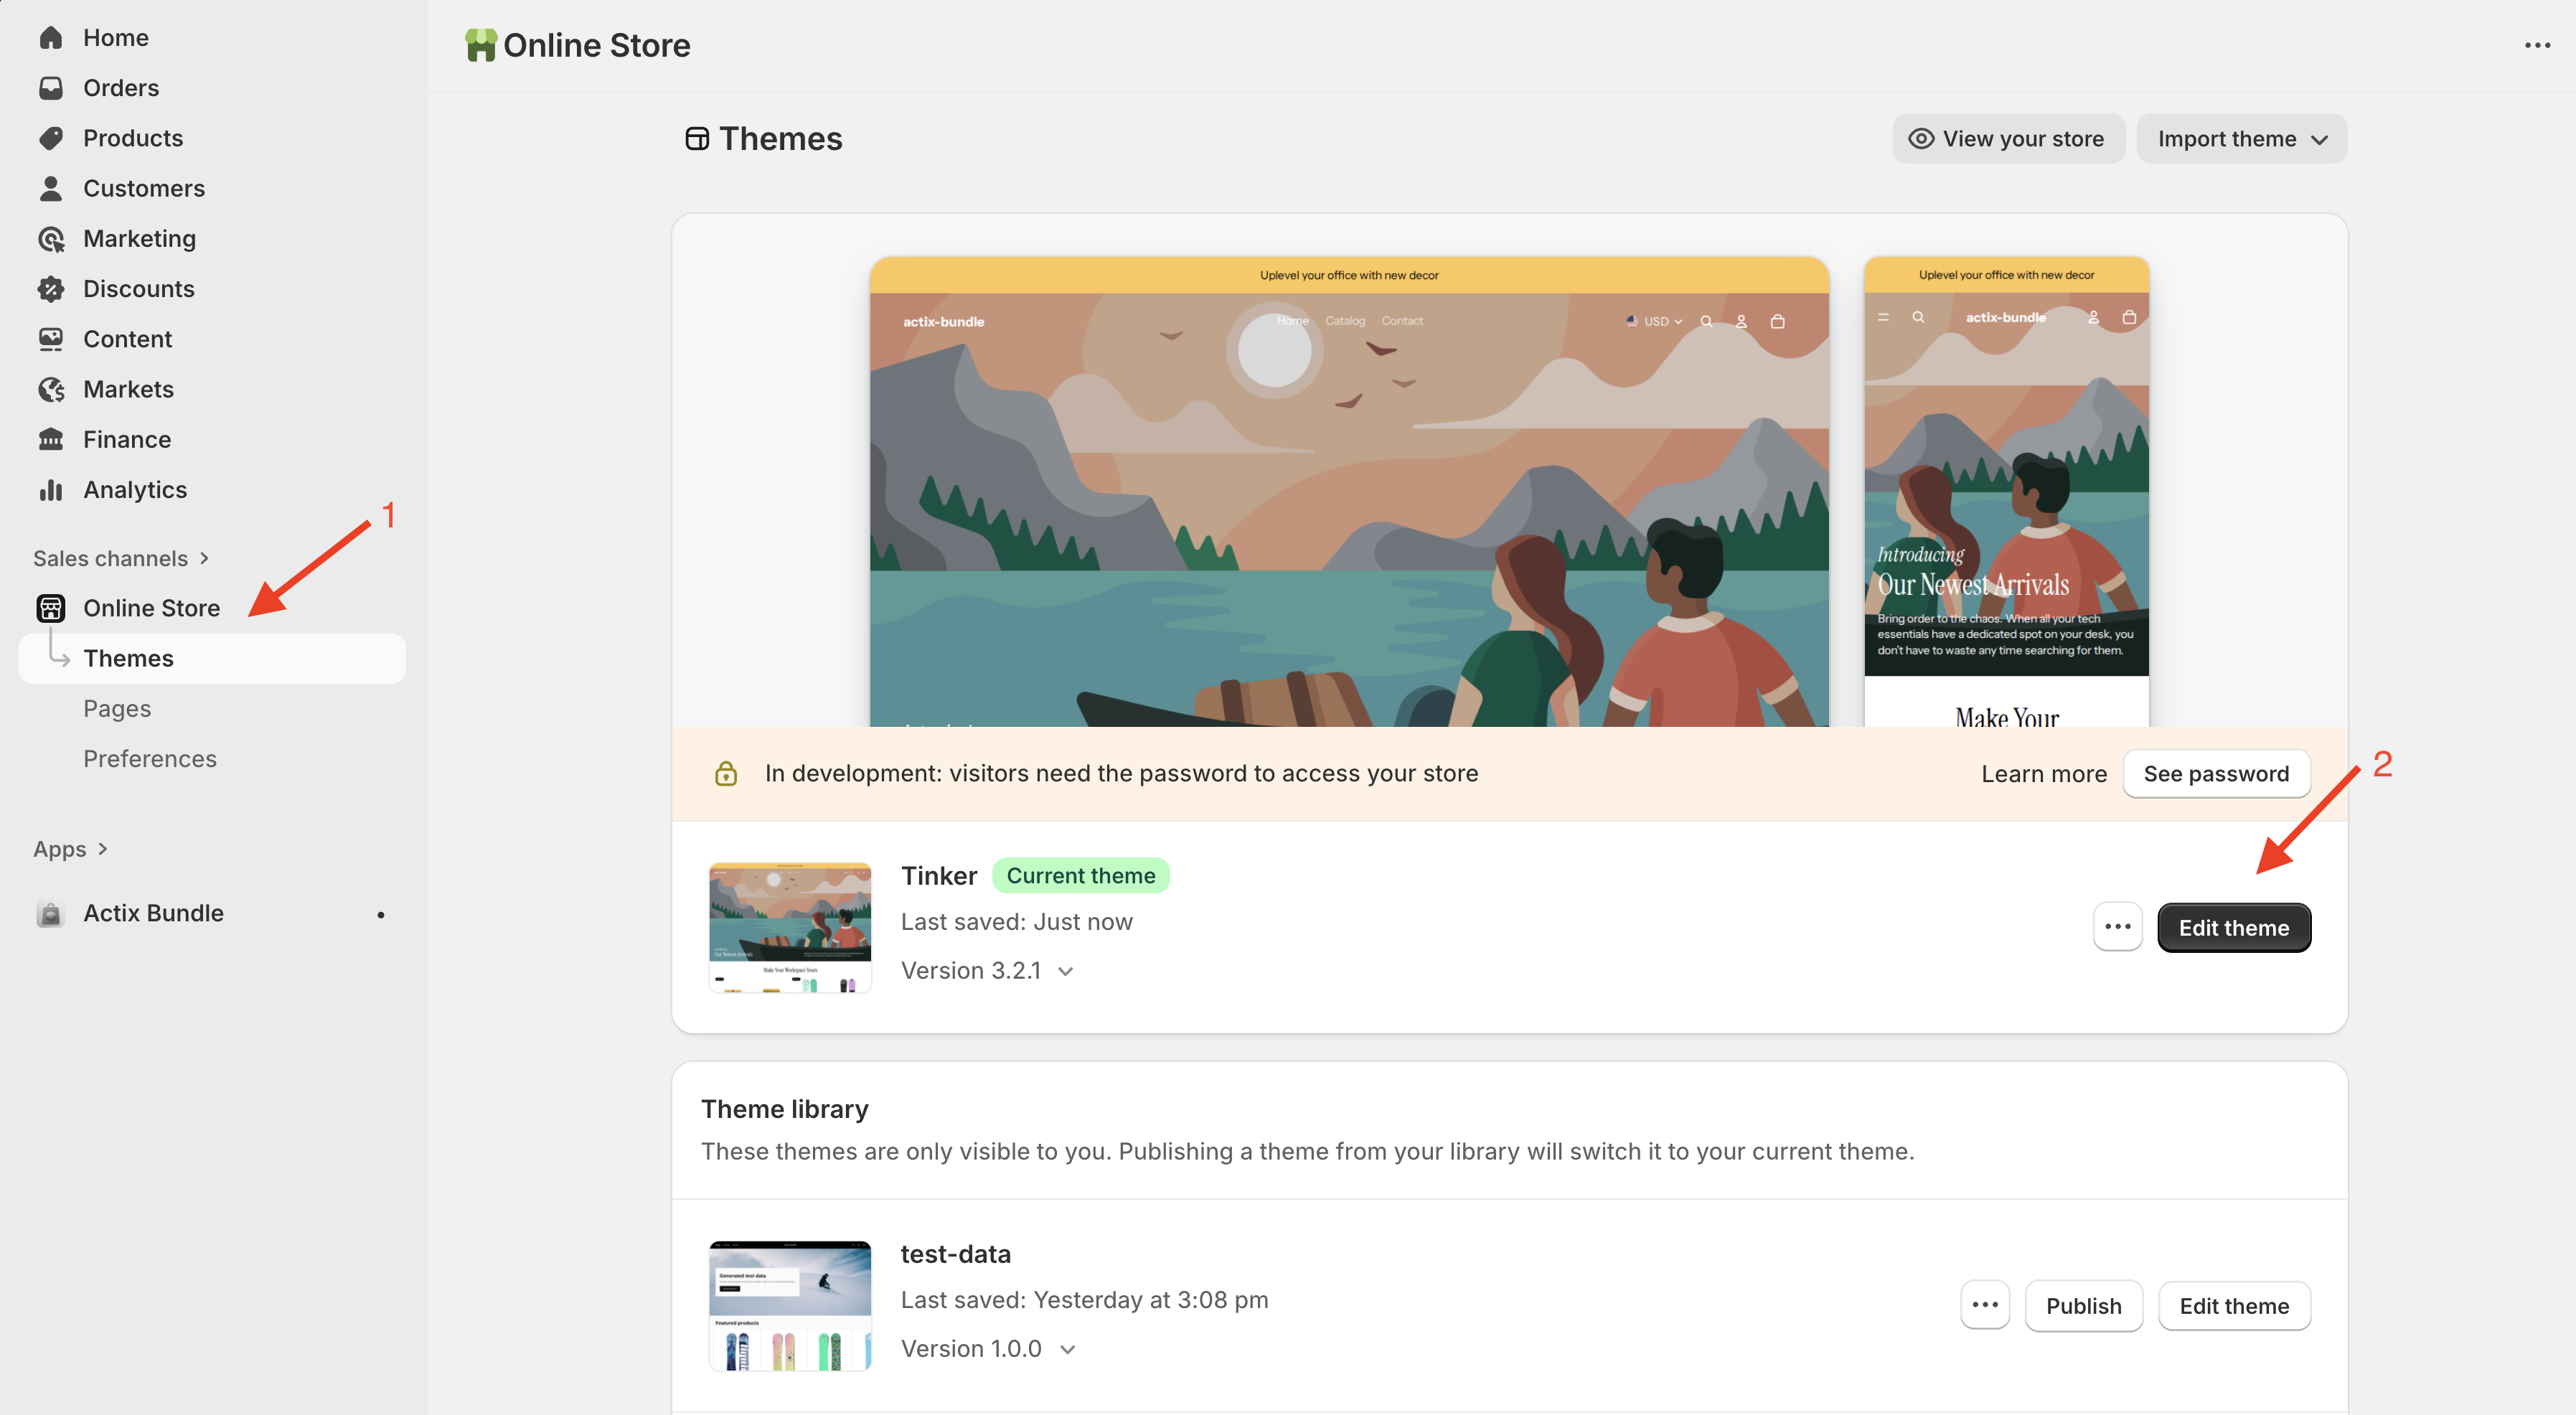
- Open Theme Editor: Click on the Go to theme editor button (or navigate to Online Store > Themes > Edit Theme).
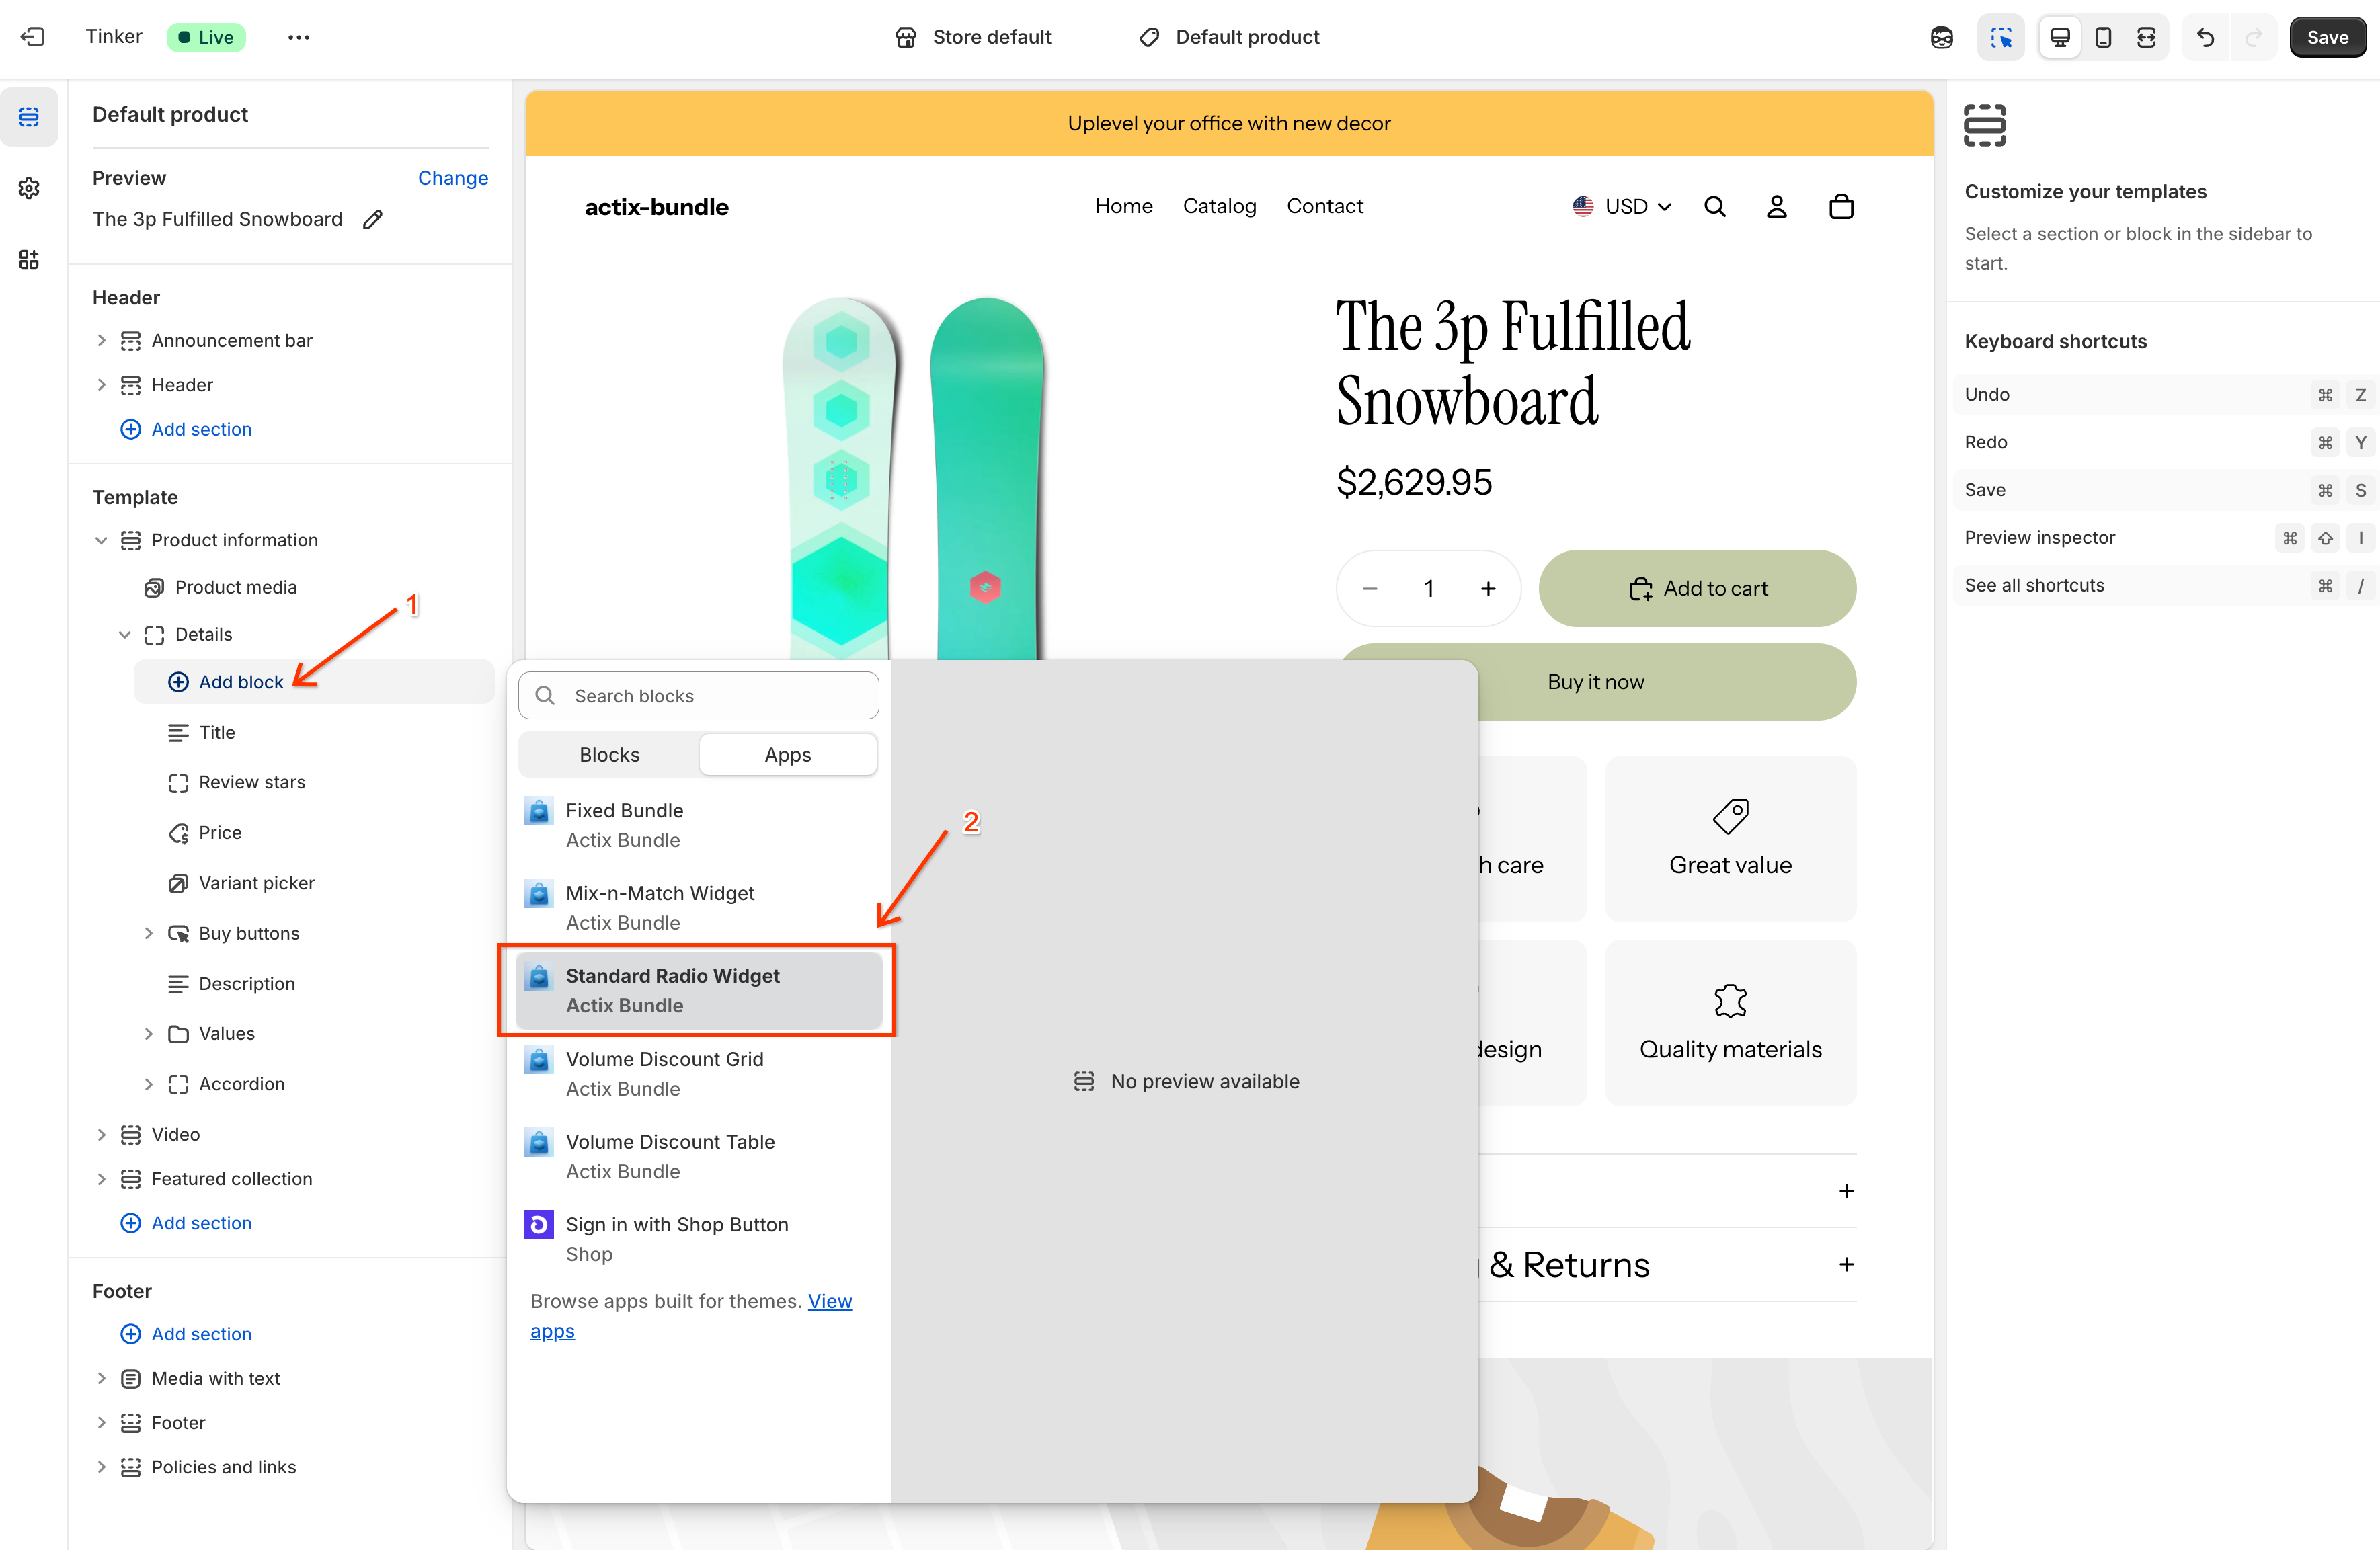
- Add Block: In the theme editor, go to the Product information section and click Add block. Select Actix Standard Volume from the list.
- Position Widget: Drag the Actix Standard Volume block to your desired location (e.g., above the Buy buttons).
- Save: Click Save in the top right corner to publish the changes.